Vercel AI SDK Integration
VoltOps LLM Observability now works framework-agnostic and provides direct integration with Vercel AI SDK. This allows you to add observability to your existing Vercel AI applications with minimal changes.
Installation
First, install the required packages:
- npm
- pnpm
- yarn
npm install @voltagent/vercel-ai-exporter @opentelemetry/sdk-node @opentelemetry/auto-instrumentations-node
pnpm add @voltagent/vercel-ai-exporter @opentelemetry/sdk-node @opentelemetry/auto-instrumentations-node
yarn add @voltagent/vercel-ai-exporter @opentelemetry/sdk-node @opentelemetry/auto-instrumentations-node
Configuration
Get Your API Keys
You'll need to get your API keys from VoltOps LLM Observability Platform:
- Sign up at console.voltagent.dev
- Create an organization for your team/company
- Create a project within your organization
- Get your keys from the project settings:
VOLTAGENT_PUBLIC_KEY- For client identificationVOLTAGENT_SECRET_KEY- For secure server communication
Setup VoltAgent Exporter
Set up VoltAgent exporter in your application (typically in your main file):
import { VoltAgentExporter } from "@voltagent/vercel-ai-exporter";
import { NodeSDK } from "@opentelemetry/sdk-node";
import { getNodeAutoInstrumentations } from "@opentelemetry/auto-instrumentations-node";

// Create VoltAgent exporter
const voltAgentExporter = new VoltAgentExporter({
  publicKey: process.env.VOLTAGENT_PUBLIC_KEY,
  secretKey: process.env.VOLTAGENT_SECRET_KEY,
  baseUrl: "https://api.voltagent.dev", // default
  debug: true, // set to true for development
});

// Initialize OpenTelemetry SDK
const sdk = new NodeSDK({
  traceExporter: voltAgentExporter,
  instrumentations: [getNodeAutoInstrumentations()],
});

sdk.start();
Basic Telemetry
Start with the minimal setup - just enable telemetry in your existing Vercel AI calls:
import { generateText } from "ai";
import { openai } from "@ai-sdk/openai";

const result = await generateText({
  model: openai("gpt-4o-mini"),
  prompt: "Hello, how are you?",
  experimental_telemetry: {
    isEnabled: true,
    // That's it! VoltAgent will track this with a default agent
  },
});

console.log("Assistant:", result.text);
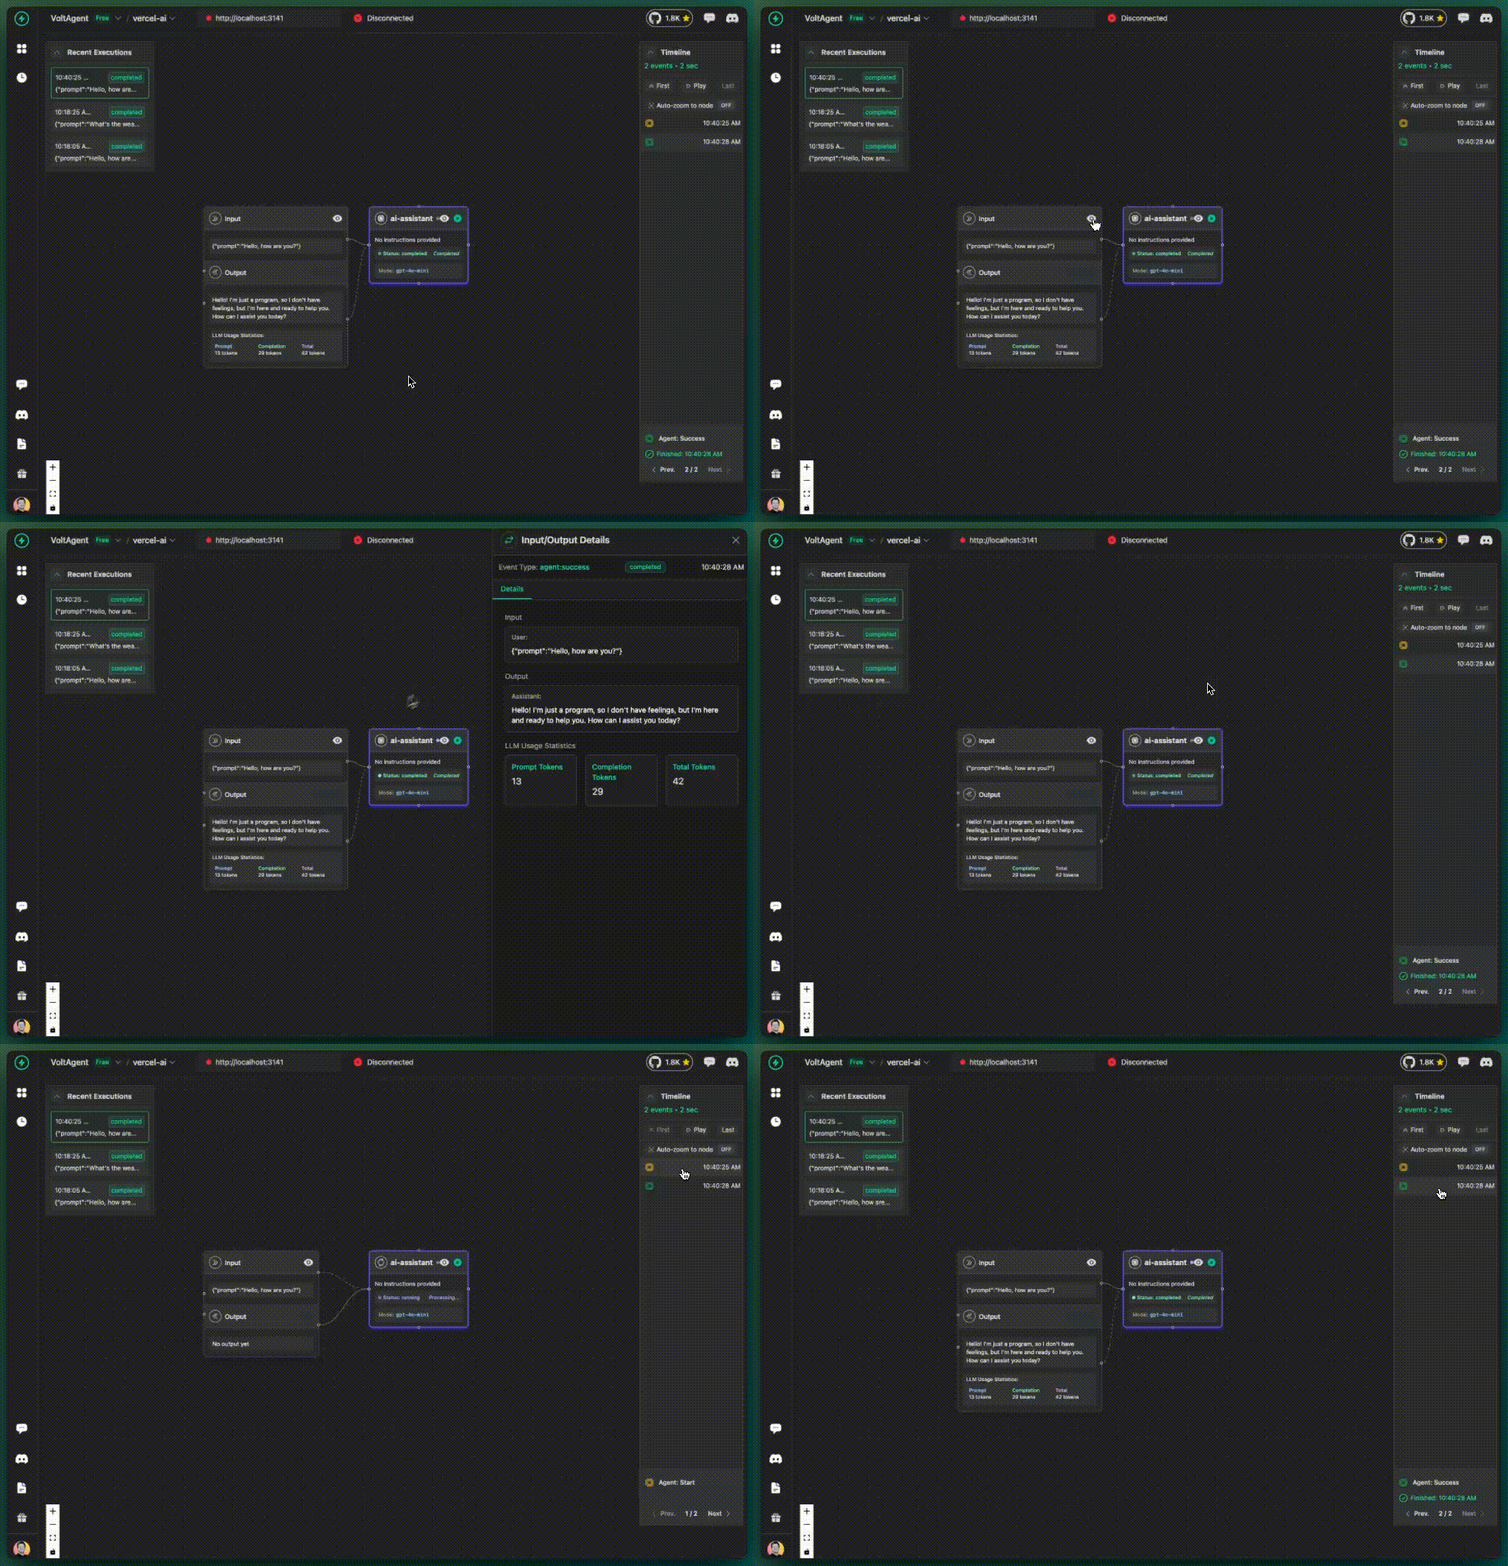
✅ What you get:
- AI calls tracked in VoltOps LLM Observability Platform
- Basic execution flow visibility
- All activities grouped under "ai-assistant" (default)
📋 VoltAgent: Using default agent for tracking.
💡 For better tracking, add agentId to your metadata:
   experimental_telemetry: {
     isEnabled: true,
     metadata: { agentId: 'my-agent' }
   }
This is completely normal! VoltAgent automatically uses a default agent when no agentId is provided. We'll show you how to customize this in the next sections.
With Tools
Same minimal setup, but now with tools to see how tool usage is tracked:
import { generateText } from "ai";
import { openai } from "@ai-sdk/openai";
import { z } from "zod";

const result = await generateText({
  model: openai("gpt-4o-mini"),
  prompt: "What's the weather like in Tokyo?",
  tools: {
    weather: {
      description: "Get the weather in a location",
      parameters: z.object({
        location: z.string().describe("The location to get the weather for"),
      }),
      execute: async ({ location }) => {
        // Simulate API call
        await new Promise((resolve) => setTimeout(resolve, 1000));
        return {
          location,
          temperature: 72 + Math.floor(Math.random() * 21) - 10,
        };
      },
    },
  },
  maxSteps: 5,
  experimental_telemetry: {
    isEnabled: true,
    // Still using default agent, but now with tools
  },
});

console.log("Assistant:", result.text);
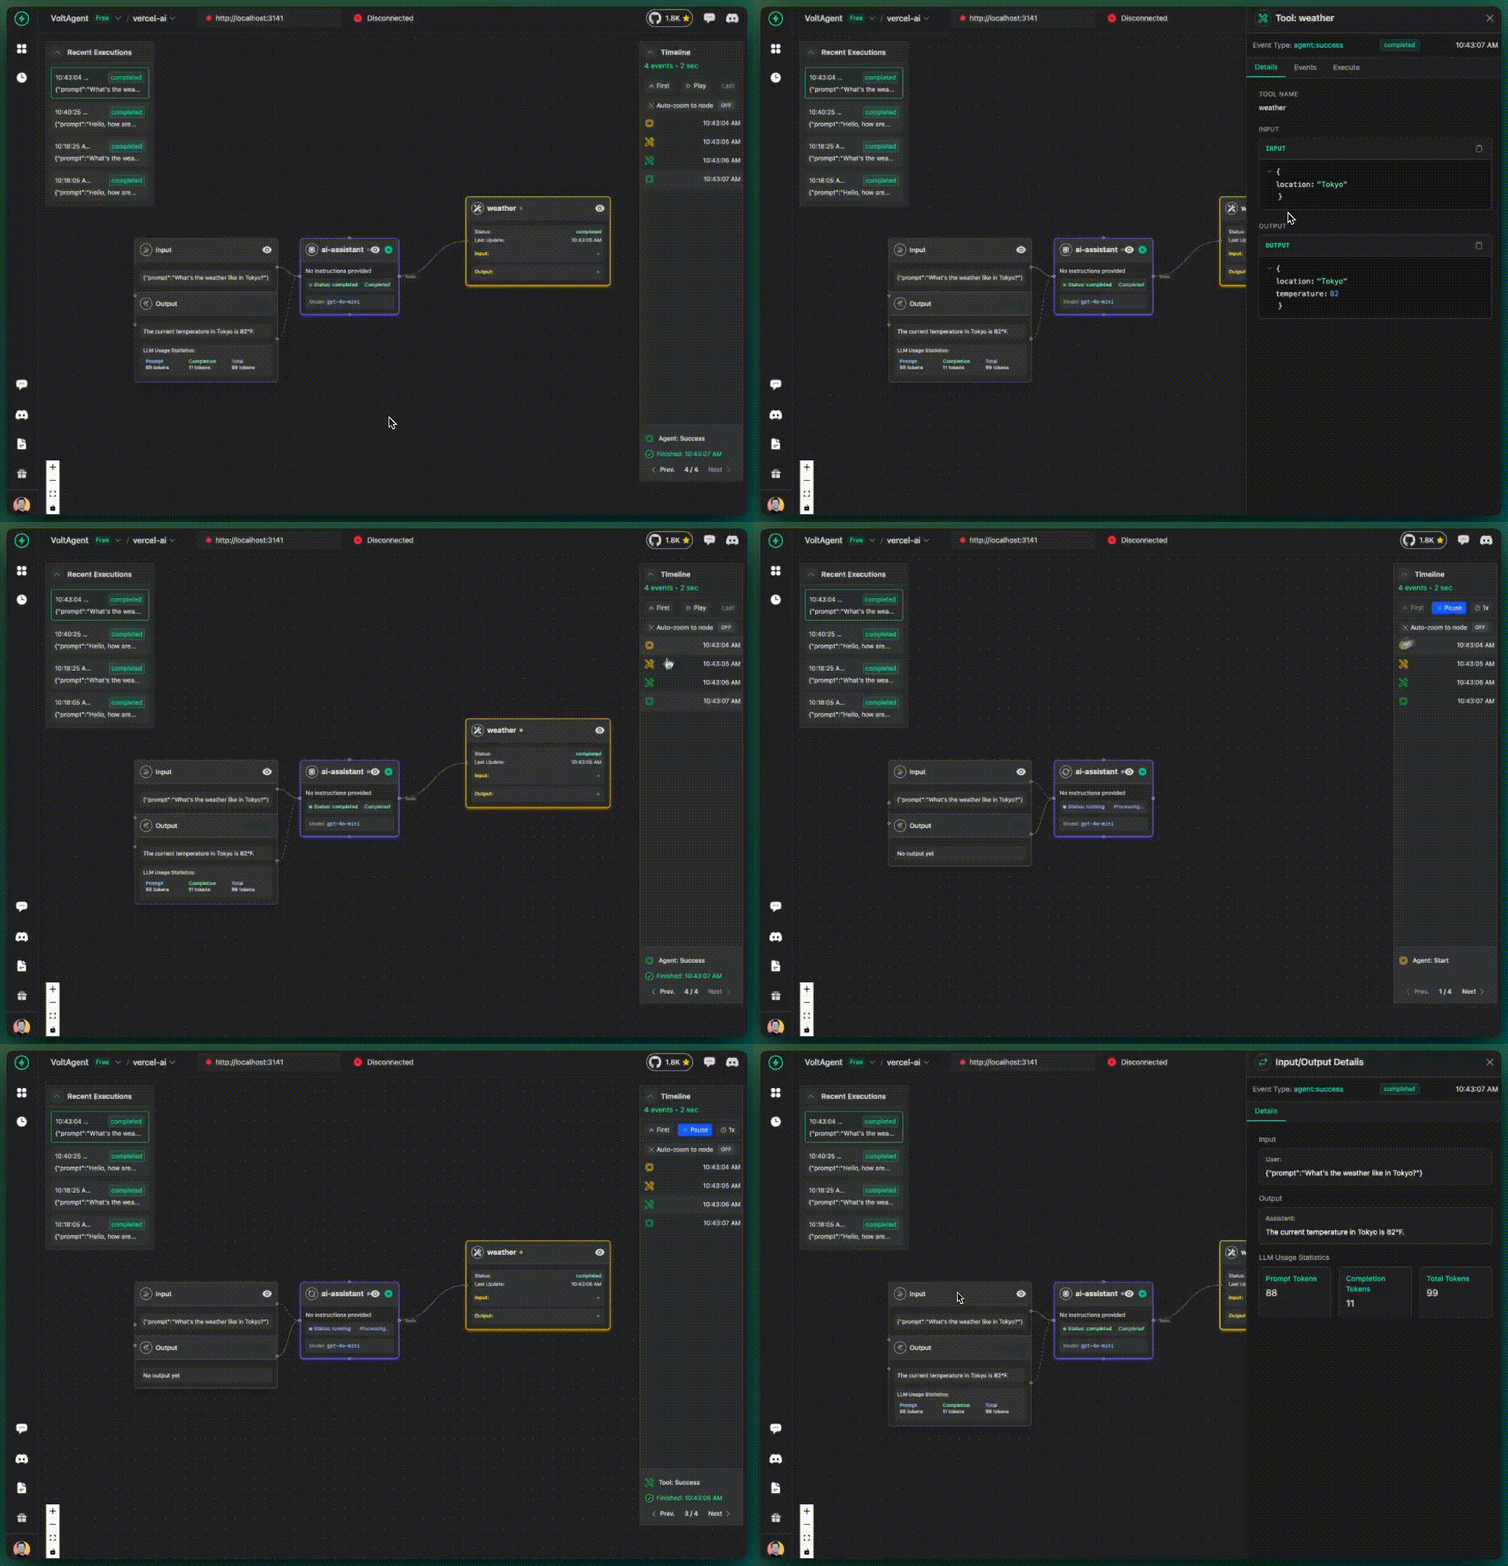
✅ What you get additionally:
- Tool calls tracked and visualized
- Tool inputs and outputs visible
- Tool execution timeline
- Still grouped under default agent
With Metadata
Now make tracking much more powerful by adding an agent identifier:
import { generateText } from "ai";
import { openai } from "@ai-sdk/openai";
import { z } from "zod";

const result = await generateText({
  model: openai("gpt-4o-mini"),
  prompt: "What's the weather like in Paris?",
  tools: {
    weather: {
      description: "Get the weather in a location",
      parameters: z.object({
        location: z.string().describe("The location to get the weather for"),
      }),
      execute: async ({ location }) => {
        await new Promise((resolve) => setTimeout(resolve, 1000));
        return {
          location,
          temperature: 18 + Math.floor(Math.random() * 21) - 10,
        };
      },
    },
  },
  maxSteps: 5,
  experimental_telemetry: {
    isEnabled: true,
    metadata: {
      agentId: "weather-assistant",
      instructions: "You are a helpful weather assistant",
    },
  },
});

console.log("Assistant:", result.text);
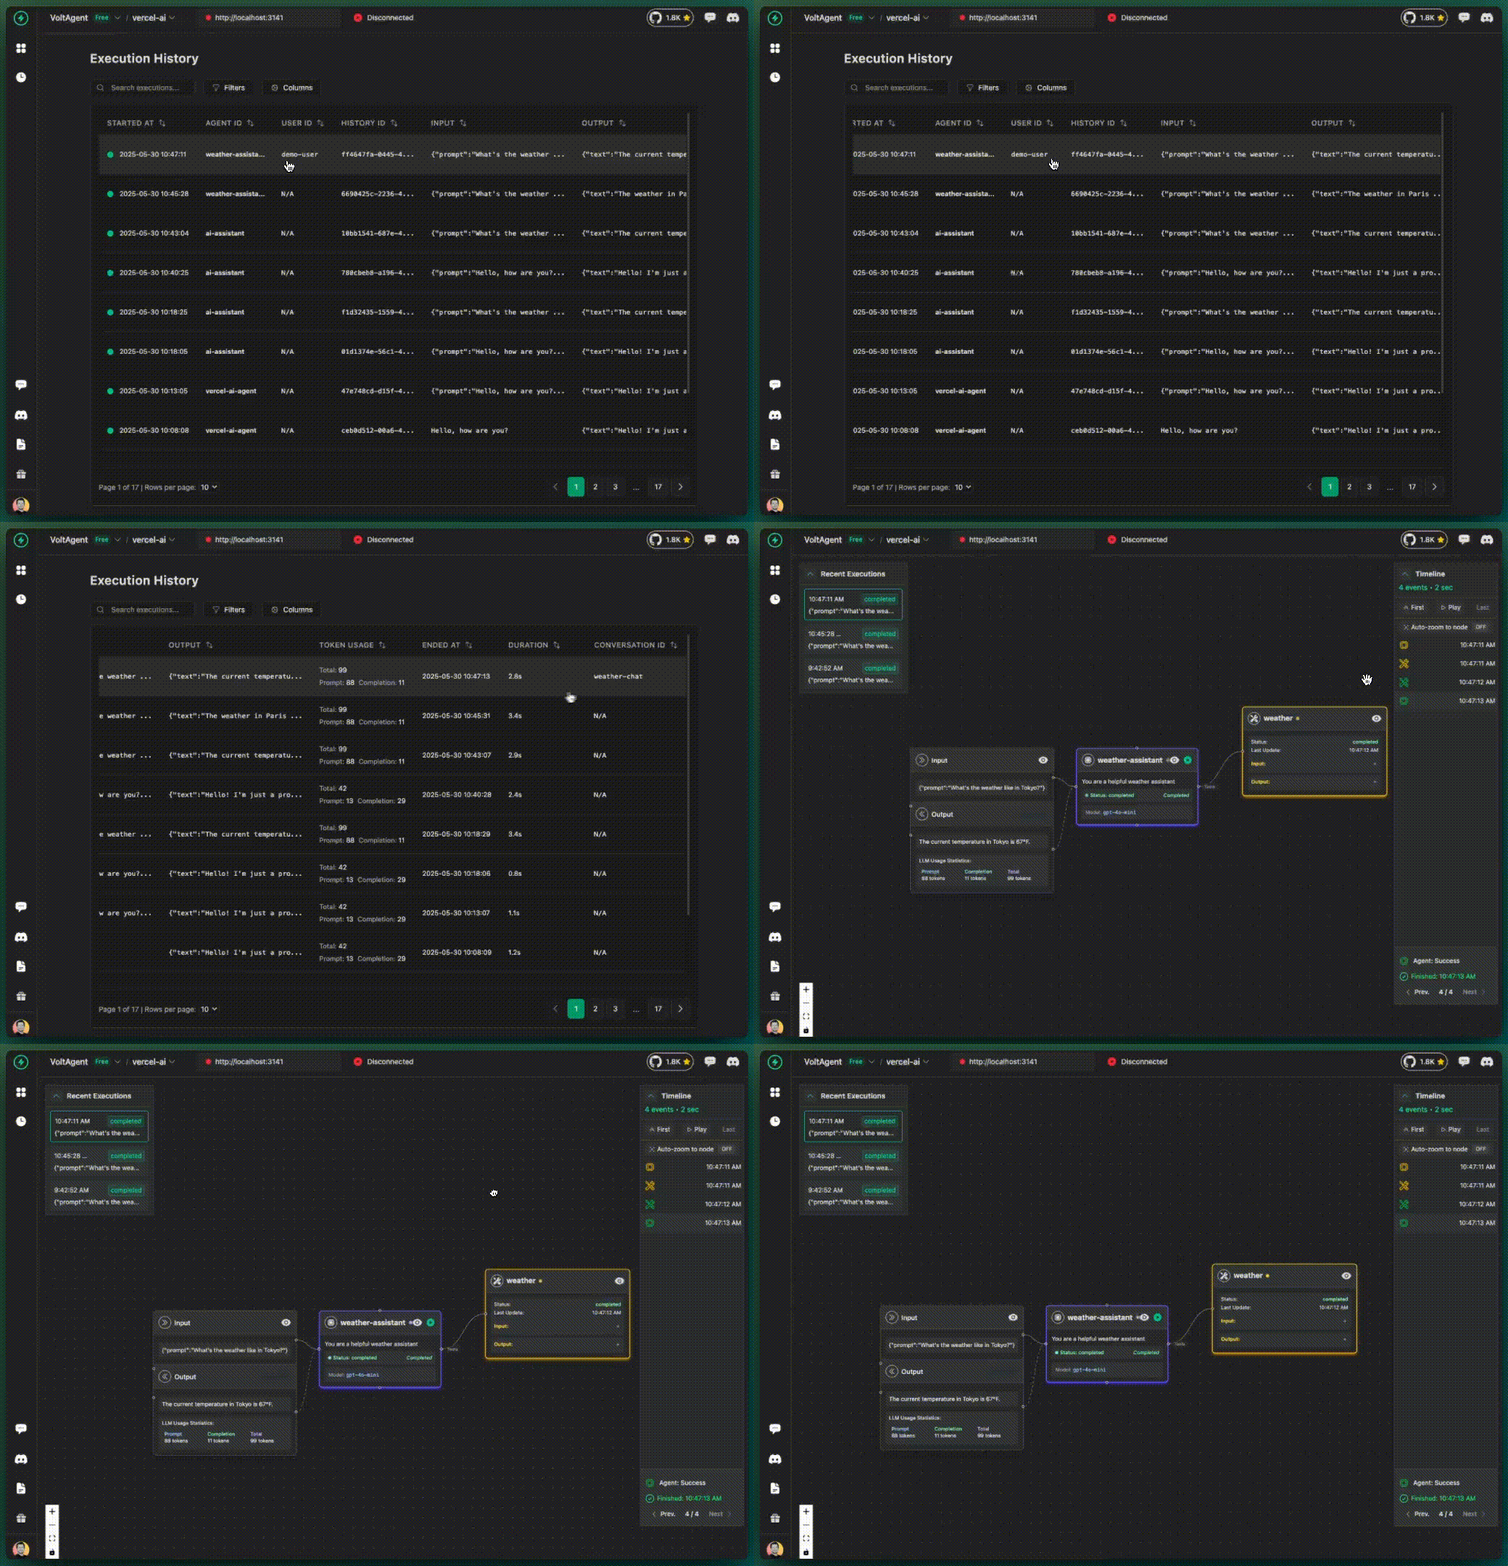
✅ What changes:
- ✨ Identified Agent: See "weather-assistant" instead of "ai-assistant"
- 📋 Instructions: Document agent purpose in console

More Metadata
For production applications, add user tracking and categorization:
const result = await generateText({
  model: openai("gpt-4o-mini"),
  prompt: "What's the weather like in Berlin?",
  tools: {
    weather: {
      description: "Get the weather in a location",
      parameters: z.object({
        location: z.string().describe("The location to get the weather for"),
      }),
      execute: async ({ location }) => {
        await new Promise((resolve) => setTimeout(resolve, 1000));
        return {
          location,
          temperature: 15 + Math.floor(Math.random() * 21) - 10,
        };
      },
    },
  },
  maxSteps: 5,
  experimental_telemetry: {
    isEnabled: true,
    metadata: {
      agentId: "weather-assistant",
      instructions: "You are a helpful weather assistant",
      userId: "demo-user",
      conversationId: "weather-chat",
      tags: ["weather", "demo", "production"],
    },
  },
});

console.log("Assistant:", result.text);
✅ Additional benefits:
- 🔍 User Tracking: Filter and analyze by user
- 💬 Conversation Grouping: Track related interactions
- 🏷️ Tags: Categorize for analytics and filtering
Multi-Agent Example
For scenarios where multiple agents work together, use parentAgentId to establish relationships:
import { generateText } from "ai";
import { openai } from "@ai-sdk/openai";

async function runMultiAgentExample() {
  // 1. Main Agent: Planning
  const { text: plan } = await generateText({
    model: openai("gpt-4o-mini"),
    prompt: "Create a plan for organizing a team meeting",
    experimental_telemetry: {
      isEnabled: true,
      metadata: {
        agentId: "planning-agent",
        userId: "team-lead",
        conversationId: "meeting-organization",
        instructions: "You create meeting plans and agendas",
        tags: ["planning", "meetings"],
      },
    },
  });

  // 2. Child Agent: Execution
  const { text: execution } = await generateText({
    model: openai("gpt-4o-mini"),
    prompt: `Execute this plan: ${plan}`,
    experimental_telemetry: {
      isEnabled: true,
      metadata: {
        agentId: "execution-agent",
        parentAgentId: "planning-agent", // Parent relationship
        userId: "team-lead",
        conversationId: "meeting-organization", // Same conversation
        instructions: "You handle meeting logistics and execution",
        tags: ["execution", "logistics"],
      },
    },
  });

  return { plan, execution };
}
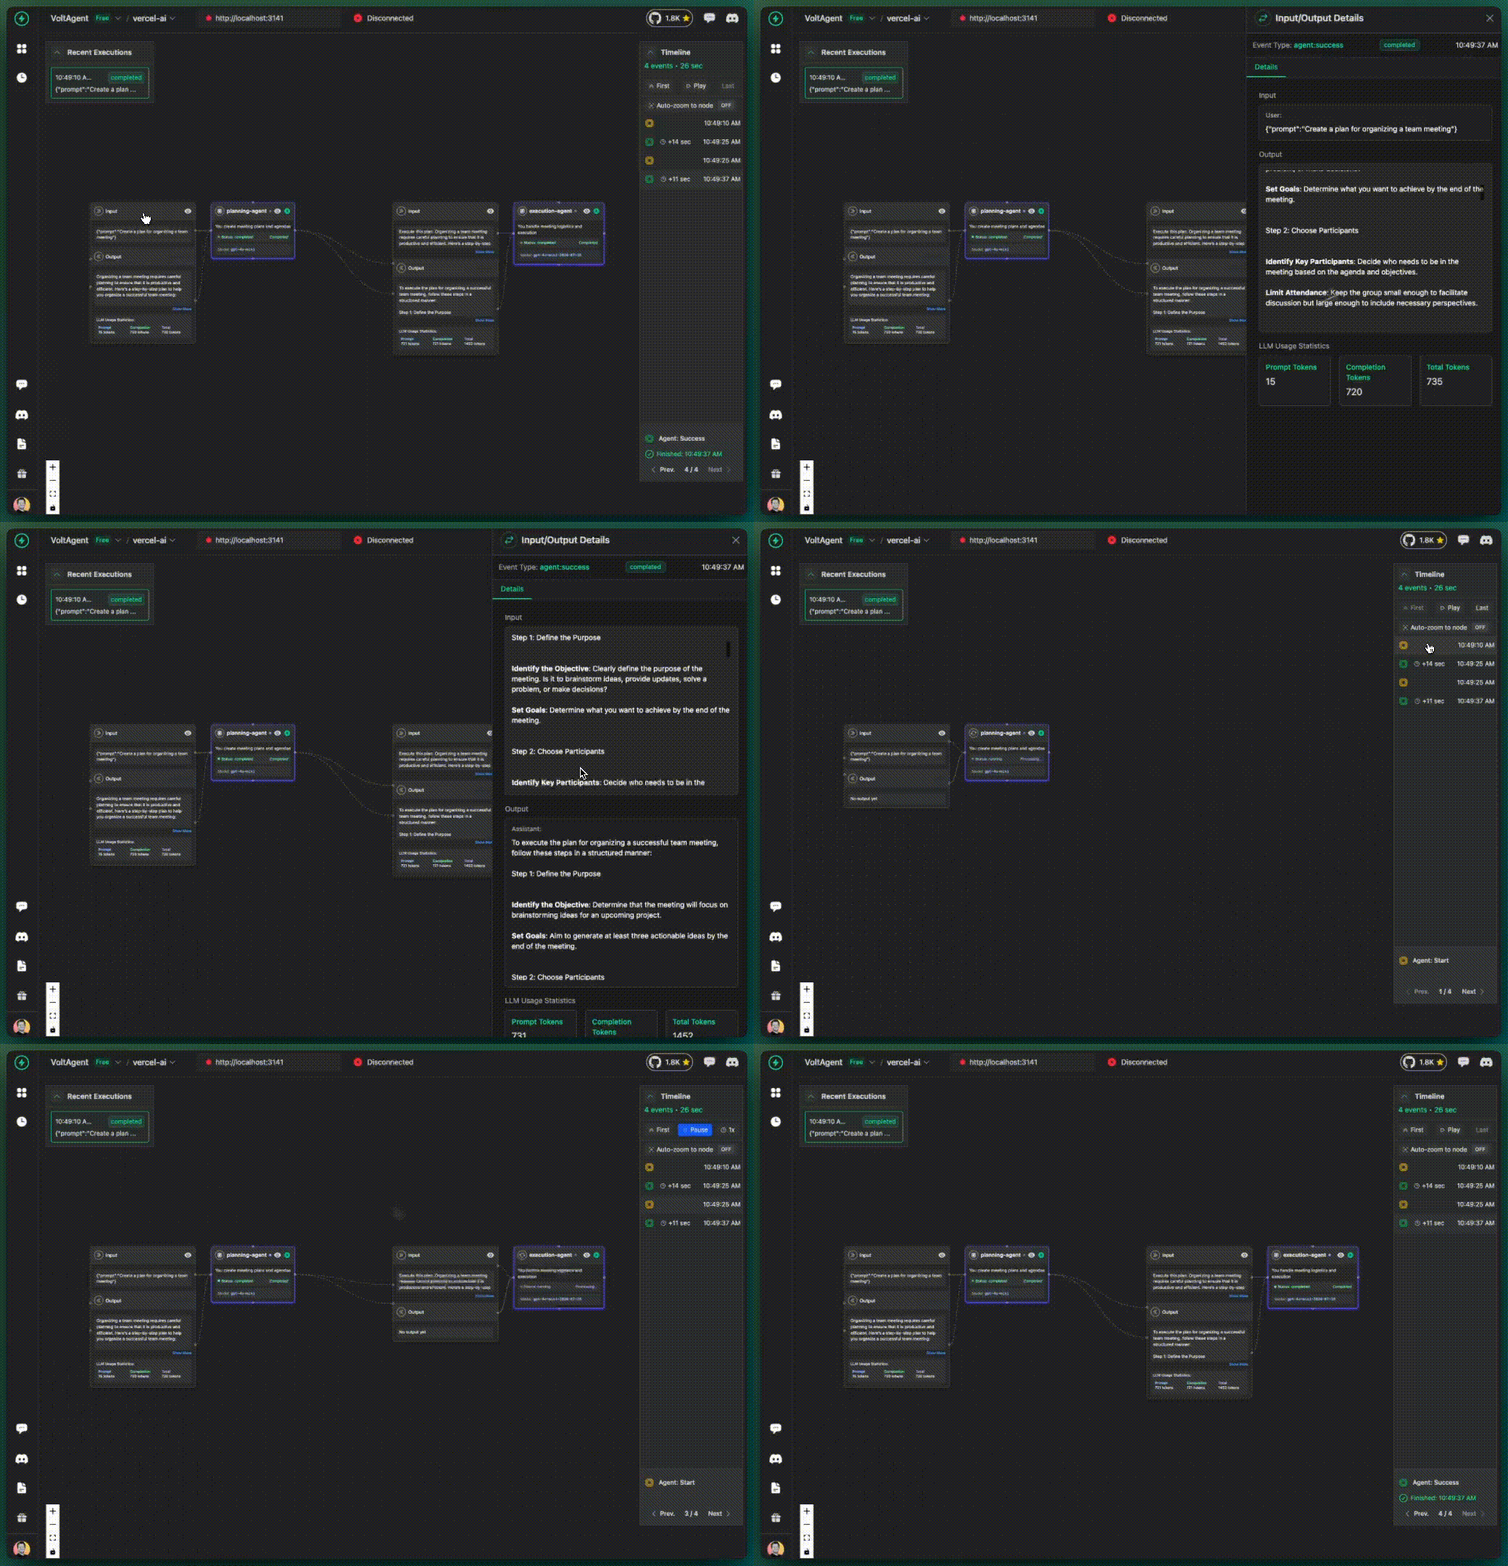
✅ What you get:
- 🔗 Parent-Child Relationships: Clear agent hierarchies
- 📈 Event Propagation: Child agent events appear in parent history too
- 🔄 Cross-Agent Context: Related agents grouped together
Complete Example
Here's a complete example showing the progression:
import { openai } from "@ai-sdk/openai";
import { generateText } from "ai";
import { VoltAgentExporter } from "@voltagent/vercel-ai-exporter";
import { NodeSDK } from "@opentelemetry/sdk-node";
import { getNodeAutoInstrumentations } from "@opentelemetry/auto-instrumentations-node";
import { z } from "zod";

// Initialize VoltAgent exporter
const voltAgentExporter = new VoltAgentExporter({
  publicKey: process.env.VOLTAGENT_PUBLIC_KEY,
  secretKey: process.env.VOLTAGENT_SECRET_KEY,
  debug: true,
});

// Set up OpenTelemetry SDK
const sdk = new NodeSDK({
  traceExporter: voltAgentExporter,
  instrumentations: [getNodeAutoInstrumentations()],
});

sdk.start();

// Run examples
async function main() {
  console.log("🚀 VoltAgent + Vercel AI SDK Examples\n");

  // Basic Telemetry
  console.log("🔷 Basic Telemetry");
  await generateText({
    model: openai("gpt-4o-mini"),
    prompt: "Hello, how are you?",
    experimental_telemetry: { isEnabled: true },
  });

  // With Tools
  console.log("🔷 With Tools");
  await generateText({
    model: openai("gpt-4o-mini"),
    prompt: "What's the weather like in Tokyo?",
    tools: {
      weather: {
        description: "Get weather",
        parameters: z.object({ location: z.string() }),
        execute: async ({ location }) => ({ location, temperature: 22 }),
      },
    },
    experimental_telemetry: { isEnabled: true },
  });

  // With Metadata
  console.log("🔷 With Metadata");
  await generateText({
    model: openai("gpt-4o-mini"),
    prompt: "What's the weather like in Paris?",
    tools: {
      weather: {
        description: "Get weather",
        parameters: z.object({ location: z.string() }),
        execute: async ({ location }) => ({ location, temperature: 18 }),
      },
    },
    experimental_telemetry: {
      isEnabled: true,
      metadata: {
        agentId: "weather-assistant",
        instructions: "You are a helpful weather assistant",
      },
    },
  });

  // More Metadata
  console.log("🔷 More Metadata");
  await generateText({
    model: openai("gpt-4o-mini"),
    prompt: "What's the weather like in Berlin?",
    tools: {
      weather: {
        description: "Get weather",
        parameters: z.object({ location: z.string() }),
        execute: async ({ location }) => ({ location, temperature: 15 }),
      },
    },
    experimental_telemetry: {
      isEnabled: true,
      metadata: {
        agentId: "weather-assistant",
        instructions: "You are a helpful weather assistant",
        userId: "demo-user",
        conversationId: "weather-chat",
        tags: ["weather", "demo", "production"],
      },
    },
  });

  // Multi-Agent Example
  console.log("🔷 Multi-Agent Example");
  await runMultiAgentExample();

  await sdk.shutdown();
}

main();
You can find a complete working example with all the code above in our GitHub repository:
📂 VoltAgent + Vercel AI SDK Example
This includes:
- Ready-to-run code
- Environment setup instructions
- Different example scenarios
- Best practices implementation
Complete Metadata Reference
experimental_telemetry: {
  isEnabled: true,
  metadata: {
    // 🎯 Core Identification
    agentId: "my-agent",              // Agent identifier
    userId: "user-123",               // User identifier
    conversationId: "conv-456",       // Conversation grouping

    // 📋 Documentation
    instructions: "Agent instructions visible in console",

    // 🏷️ Organization
    tags: ["category", "priority", "team"],

    // 🔗 Multi-Agent Support
    parentAgentId: "parent-agent",    // Parent-child relationships

    // 📊 Custom Business Data
    projectId: "proj-001",
    department: "engineering",
    version: "1.0.0",
    environment: "dev",
    // ... any custom fields
  },
}
Best Practices
Implementation Steps
- Start: Enable telemetry (
isEnabled: true) - Identify: Add
agentIdfor better tracking - Organize: Add
userIdandconversationId - Enhance: Add
tagsand custom metadata
Production Tips
-
Always use meaningful
agentIdnames// ❌ Bad: Generic names
agentId: "agent1", "my-agent", "assistant";
// ✅ Good: Descriptive names
agentId: "customer-support-bot", "content-writer", "code-reviewer"; -
Include
userIdfor user behavior analysisexperimental_telemetry: {
isEnabled: true,
metadata: {
agentId: "customer-support-bot",
userId: req.user.id, // or session.userId, auth.userId
// Now you can filter and analyze by user
},
} -
Use
conversationIdfor multi-turn conversations// Generate once per conversation, reuse for related messages
const conversationId = `conv_${Date.now()}_${userId}`;
experimental_telemetry: {
isEnabled: true,
metadata: {
agentId: "chat-assistant",
userId: "user-123",
conversationId, // Same ID for all messages in this conversation
},
} -
Add
tagsfor filtering and analyticsexperimental_telemetry: {
isEnabled: true,
metadata: {
agentId: "content-assistant",
tags: [
"content-creation", // Feature category
"high-priority", // Priority level
"marketing-team", // Department
"blog-post", // Content type
],
},
} -
Include business metadata for insights
experimental_telemetry: {
  isEnabled: true,
  metadata: {
    agentId: "order-processor",
    userId: "customer-456",
    // Business context
    orderId: "order_123",
    customerTier: "premium",
    region: "us-west",
    version: "v2.1.0",
    environment: process.env.NODE_ENV,
    feature: "checkout-flow",
  },
}
Error Handling
// Graceful shutdown
process.on("SIGINT", async () => {
  console.log("Shutting down gracefully...");
  await sdk.shutdown();
  process.exit(0);
});
Next Steps
- Explore VoltOps Platform features
- Check out Multi-agent examples
- Learn about production monitoring setup